Install Redmine 3.x on Ubuntu 14.04 with Apache2 through Phusion Passenger.
Redmine runs on Ruby on Rails, how to install Ruby on Rails you can read here: How to install Ruby & Rails on Ubuntu.
Redmine user
Create a user for Redmine, to do this, open the console and enter the command:
sudo adduser --system --shell /bin/bash --gecos 'Redmine Administrator' --group --disabled-password --home /opt/redmine redmine
Visudo configuration
sudo visudo
Add the following lines:
# temp - *REMOVE* after installation
redmine    ALL=(ALL)      NOPASSWD:ALL
Please note that the user Redmine will be able to run root commands, but this is only to facilitate follow-up. Remove the line after installation.
Installing Redmine
Preparation
Authorize yourself as user of redmine and install rvm for him:
sudo su - redmine
gpg --keyserver hkp://pgp.mit.edu --recv-keys 409B6B1796C275462A1703113804BB82D39DC0E3
curl -sSL https://get.rvm.io | bash -s stable
exit
Logout and sign in again for install ruby:
sudo su - redmine
rvm install 2.2.4
exit
Redmine
Example for the release of 3.2.2, change the version number for another release:
sudo su - redmine
wget http://www.redmine.org/releases/redmine-3.2.2.tar.gz
tar zxf redmine-3.2.2.tar.gz
rm redmine-3.2.2.tar.gz
ln -s /opt/redmine/redmine-3.2.2 redmine
exit
MySQL
Create a database and user for it:
sudo mysql -u root -p
CREATE DATABASE redmine character SET utf8;
CREATE user 'redmine'@'localhost' IDENTIFIED BY 'my_password';
GRANT ALL privileges ON redmine.* TO 'redmine'@'localhost';
exit
Configure a database connection:
sudo su - redmine
cp redmine/config/database.yml.example redmine/config/database.yml
Editing configuration to connect to the database:
sudo mcedit redmine/config/database.yml
Change the user name and password:
database.yml:
production:
 adapter: mysql2
 database: redmine
 host: localhost
 username: redmine
 password: my_password
 encoding: utf8
Initialization Redmine
gem install bundler
cd redmine/
bundle install --without development test postgresql sqlite
rake generate_secret_token
RAILS_ENV=production rake db:migrate
RAILS_ENV=production rake redmine:load_default_data
exit
If you have problems when installing bundles, then you have something that is not installed on your system. I did not have 2-3 programs, install them:
sudo apt-get install libmagickcore-dev libmagickwand-dev libmysqlclient-dev
Again try to install the bundles:
bundle install --without development test postgresql sqlite
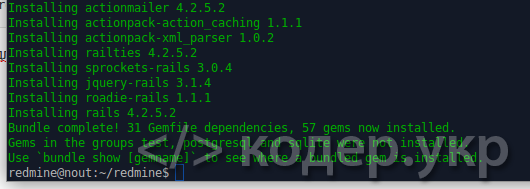
Successful installation of bundles looks like:

Continue to make configuration settings.
If you see an error in the performance of the team rake generate_secret_token:

Than you need opening dependency file for editing:
mcedit /opt/redmine/redmine/Gemfile.lock
We find in it the line with htmlentities 4.3.1 and replace to 4.3.4.
If you have an error:
redmine@nout:~/redmine$ rake generate_secret_token
[DEPRECATION] `last_comment` is deprecated.  Please use `last_description` instead.
We find in the /opt/redmine/redmine/Gemfile.lock, rake 11.1.2 (in my case) and replace to 10.4.2
Remove the root privileges from redmine user
sudo visudo
Remove the following entries:
# temp - *REMOVE* after installation
redmine    ALL=(ALL)      NOPASSWD:ALL
Installing Phusion Passenger
Adding a repository:
sudo apt-key adv --keyserver keyserver.ubuntu.com --recv-keys 561F9B9CAC40B2F7
sudo apt-get install apt-transport-https ca-certificates
Open the config file of repository:
sudo nano /etc/apt/sources.list.d/passenger.list
Adding to /etc/apt/sources.list.d/passenger.list repository address:
deb https://oss-binaries.phusionpassenger.com/apt/passenger trusty main
Set user and permissions to file:
sudo chown root: /etc/apt/sources.list.d/passenger.list
sudo chmod 600 /etc/apt/sources.list.d/passenger.list
Installing Phusion Passenger
sudo apt-get update
sudo apt-get install libapache2-mod-passenger
Passenger configure
sudo nano /etc/apache2/mods-available/passenger.conf
Add the following lines to the configuration file:
PassengerUserSwitching on
PassengerUser redmine
PassengerGroup redmine
Open the file config Virtual Host of Apache:
sudo nano /etc/apache2/sites-available/000-default.conf
Add the following section in the config file:
<Directory /var/www/html/redmine>
    RailsBaseURI /redmine
    PassengerResolveSymlinksInDocumentRoot on
</Directory>
Turn passenger. Add a link to redmine and restart Apache2:
sudo a2enmod passenger
sudo ln -s /opt/redmine/redmine/public/ /var/www/html/redmine
sudo service apache2 restart
Generate a new secret key, clean-up session and cache:
sudo su - redmine
cd redmine
rake generate_secret_token
rake db:migrate RAILS_ENV=production
rake redmine:plugins:migrate RAILS_ENV=production
rake tmp:cache:clear
rake tmp:sessions:clear
exit
Run redmine
Host: http://localhost/redmine
Login Information:
Username: admin
Password: admin
Configure redmine to send mail through Google mail (Gmail).
Create a config:
sudo su - redmine
cd redmine/config
cp ./configuration.yml.example ./configuration.yml
Add settings in the config:
nano ./configuration.yml
At the end of the file add the section of the
production:
  email_delivery:
    delivery_method: :smtp
    smtp_settings:
      enable_starttls_auto: true
      address: "smtp.gmail.com"
      port: '587'
      domain: "smtp.gmail.com"
      authentication: :plain
      user_name: "your_email@gmail.com"
      password: "your_password"
Logout from user redmine and restart of apache2:
exit
sudo service apache2 restart
Check the operation of mail, you can on tab: http://localhost/redmine/settings?tab=notifications
On this tab, at the bottom there is a link to send a test mail.
If you are logged on this tab or after setting the site stopped working, most likely you incorrectly formatted configuration, indents are very important!
P.S.:Now you have a tool for project management.
Good luck)
